Wednesday, June 18, 2014

Belts/Pulley - Connecting the Motors to the Wheels

Small XL (1/5 Pitch) Pulley - 10 Tooth

9" XL (1/5 Pitch) Pulley - 45 Tooth

Large XL (1/5 Pitch) Pulley - 30 Tooth
I ordered all the pulleys online, the big one off Ebay and the small one off Servocity.com. I got the 9" belts from a McGuire bearing which were surprisingly cheaper than online. The small pulley has to be bored out to 8mm (about 5/16") from 1/4" to fit the motor shaft. The motor shaft will have to be notched to for the set screw in the small pulley. The large pulley will need to be bored out to about 1" to clear the 3/4" truck axle. Then holes drilled and tapped for mounting to the wheels.

Wheels

I decided to use wheels I found for $30 off ebay. They are Blank Pro Flywheels that come with ABEC 7 bearing and spacers. What's nice about these wheels other than being cheap is that they are larger than the average longboard wheels. They are 83mm in diameter which allows for more clearance between the pulleys I'll mount to them and the ground. Another good thing is that they already have holes through the center around the bearing hole for mounting a pulley, so I don't have to drill my own holes. Plus they come in different sizes such as 90mm and 97mm. I already have a set of the 97mm ones. Theoretically, the pulleys will fit all the sizes and the larger the wheel I use the faster the board will go.

Motors and Motor Mounts

Motor Mounts
Motor Mounts (alt view)

Mounts with the Motors on them

Mounts with Motors on the Trucks

Mounts with Motors on the Trucks (alt view)
Not much to describe except tap holes properly. I used too big a drill bit and ended up stripping the 1/4 threads I tapped so I had to move up to 5/16 bolts/hole. Doing it this way makes sure it clamps properly and stays in place, plus I can adjust how far up or down the motors are.

50mm Brushless Outrunner Motor
The motors being used is a brushless outrunner (the outside of the motor spins as opposed to the inside which usually does) bought off Hobby King. It is 50mm in diameter, the max voltage it is rated for is 6S (22.2V) and the max rated current is 90A. The max power is 2000W at 22.2V. The motor has 3 leads coming off of it because it uses alternating currents to drive the motor because there is no commutator like on a brushed motor. Therefore the motor requires a motor controller to drive it unlike brushed DC motors that can run directly off a battery. What controller is used will be talked about later. Link to product page on Hobby King

Motor Mounts - Design

3D Rendering Wire Frame
3D Rendering
The motor mounts for the brushless motors. The large hole goes around the trucks axle which is about 3/4" round. Not pictured is there will be screws on the motor mount that clamp down on the axle. The motor shaft goes through the top small hole and get screwed in through holes that aren't pictured. The bottom and top pieces are connected with a screw that isn't shown. Hopefully I'll make it adjustable.

Battery Packs

One Side

The Other Side
Finished pack wrapped in electrical tape but no connectors.
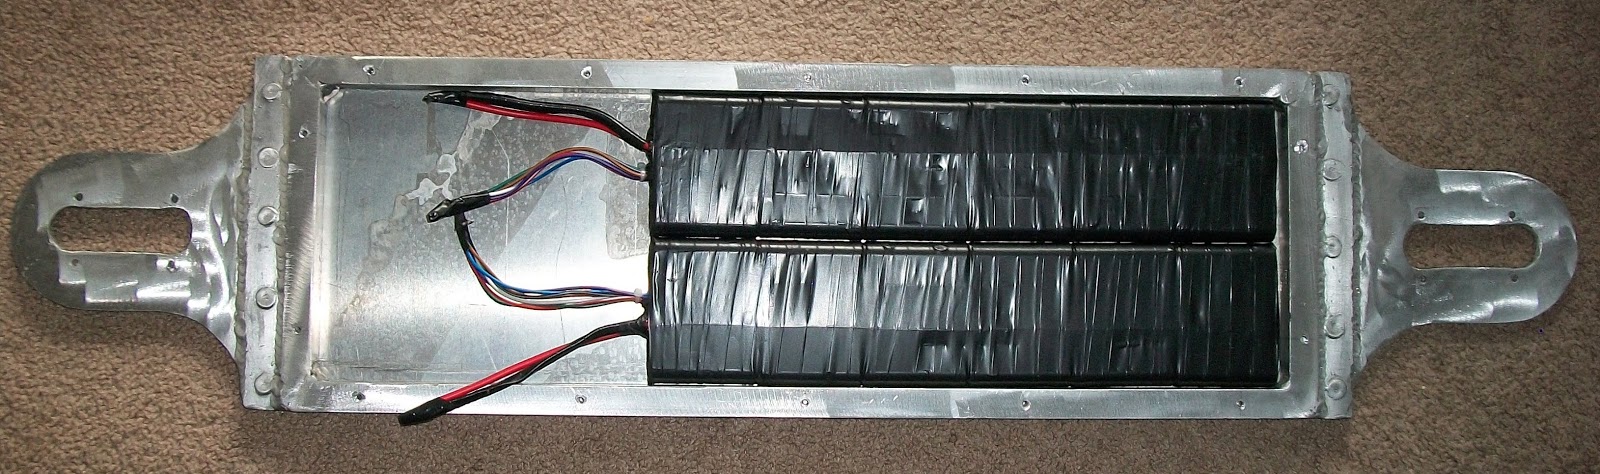
Battery pack in the board. Fits well.
One of the two battery packs made up of 30 18650 Samsung Lithium Ion Cells. The same type of batteries that Tesla uses in their cars but I think they use Panasonic batteries. Each row of 5 is wired in parallel with each other with braided wire and those 6 are wired in series to make a nominal voltage of 22.2V (3.7Vx6=22.2V). I used hot glue to glue them together and glue in the wires between the gaps of the batteries. There has to be a wire between each parallel wired row for the purposes of charge balancing. The main end wires are 10 gauge to handle the high amperage. According to the spec sheet each battery should put out 2C with a 2.6 amp hour capacity equals a 5.2 amp max discharge current per cell. That times 30 cells equals (30x5.2A) 156 amps max discharge per pack. Which is more than enough for the two 120A motor controllers and the two 90A BLDC motors. Link to the Samsung 18650 cell spec sheet.

Frame for Longboard with Top and Bottom Plates

Top
Top (alt view)
Bottom

Bottom (alt view)
Top with Top Plate
Top with Top Plate (alt view)
Bottom with Bottom Plate
Bottom with Bottom Plate (alt view)
Frame is made of 1/8" thick 3/4" square aluminum tubing. End plates are 1/4" thick aluminum plate with a 1" wide 1/4" thick piece helping connect the end plates to the tube frame. Overall length is 40" long and 9" wide. The dimensions of the inside are 24.5" by 7.5" which means the dimensions of the aluminum frame are 26" by 9". The holes on the end plates are so the trucks can be mounted on the bottom or the top through the hole. The top is 1/8" aluminum thick plate that is 28" by 9" and the bottom plate is 26" by 9" of the same metal as the top. I'll add grip tape to the top plate later.


Saturday, May 3, 2014

AutoCAD 3D Rendering of Longboard Frame

3D rendering in AutoCAD of the frame of my longboard. Overall length is 40.5", the length of the square tubing frame is 26" by 9" using 3/4" aluminum tubing that is 1/8" thick. End pieces are 1/4" thick aluminum. 1/8" thick aluminum plate will be used on the top on bottom to the board. Aluminum was used to keep weight down.

 All the batteries and electronics will go in the middle, I'll make battery packs out of 60 used Samsung 18650 batteries that come out of laptops. Which should fit nicely because they are just under 3/4" diameter. Modifications will have to be made to the motor controllers to make them fit. I may also include a few chargers so I can just plug in a power adapter to charge it. But more on that later.